Discover how to resolve the common issue of Windows user profile not loading, and regain access to your computer.
Understanding User Profile Cannot Be Loaded Error
When you encounter the “User Profile Cannot Be Loaded” error in Windows, it means the system is unable to load your user profile data. The issue can be caused by corrupt user profiles, corrupt system files, or incorrect user account settings. Here are some steps to fix the issue:
1. Restart your computer in Safe Mode using the F8 key during startup.
2. Log in with an administrator account.
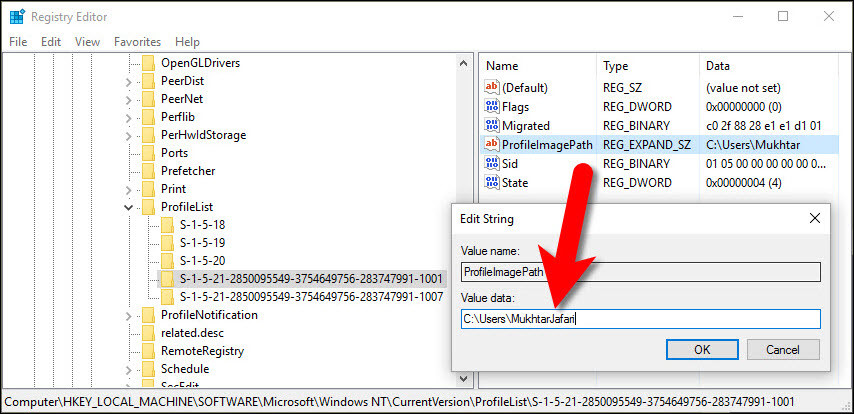
3. Open the Registry Editor by typing “regedit” in the Run command.
4. Navigate to “HKEY_LOCAL_MACHINE\SOFTWARE\Microsoft\Windows NT\CurrentVersion\ProfileList”.
5. Find the folder with your user name and delete it.
6. Restart your computer normally and sign in with your user account.
7. Windows will create a new user profile and your data should be restored.
If these steps don’t work, you may need to try other methods such as updating Windows or checking your system files for errors. Always make sure to back up your important files before attempting any fixes to avoid data loss.
Methods to Fix User Profile Cannot Be Loaded Error
- Click on the Windows Start button to access the power button.
- Select Restart from the options.
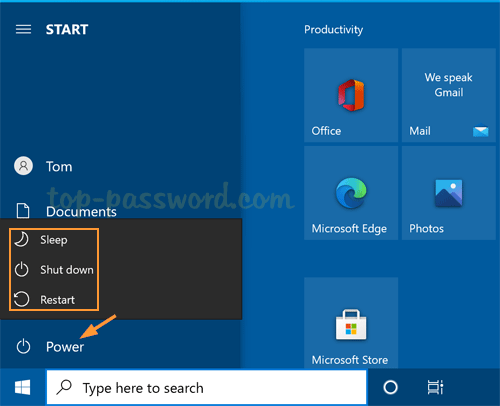
- Wait for the computer to restart and try logging in again.
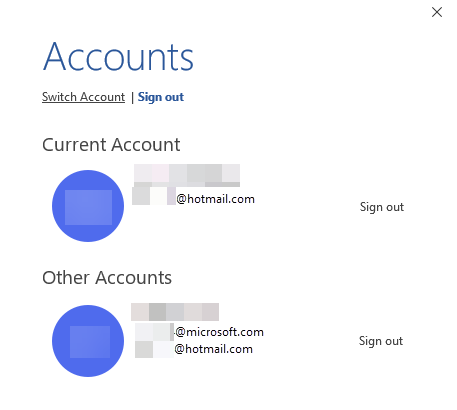
Method 2: Log in with Another Account
- If you have another user account on your computer, log in with that account.
- Once you are logged in, open File Explorer.
- Go to the C:\Users folder and find the folder with the problematic user name.
- Right-click on the folder and select Rename.
- Change the name of the folder to something else.
- Log out of the current account and try logging in with the original account again.

Method 3: Use System Restore
- Restart your computer and press F8 repeatedly until the Advanced Boot Options menu appears.
- Select Safe Mode with Command Prompt and press Enter.
- When the Command Prompt window appears, type rstrui.exe and press Enter.
- Follow the prompts to restore your system to an earlier point in time.
- Restart your computer and try logging in again.
Method 4: Create a New User Account
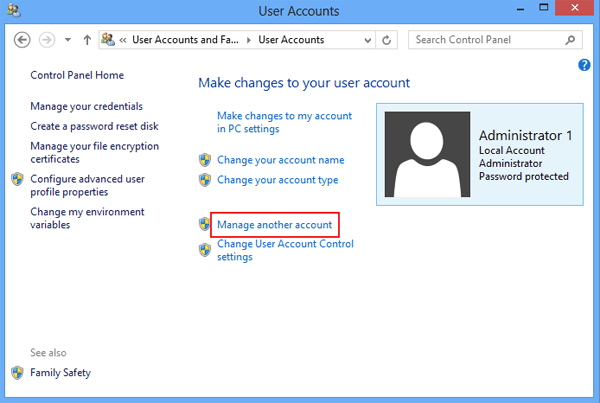
- Open the Control Panel and go to User Accounts.
- Select Manage another account.
- Click on Add a new user in PC settings.
- Follow the prompts to create a new user account.
- Log out of the current account and try logging in with the new account.
Booting Windows into Safe Mode
To fix the “Windows User Profile Cannot Be Loaded” error message, you can boot Windows into Safe Mode and use the User Profile Service to repair the corrupt user profile. Here’s how:
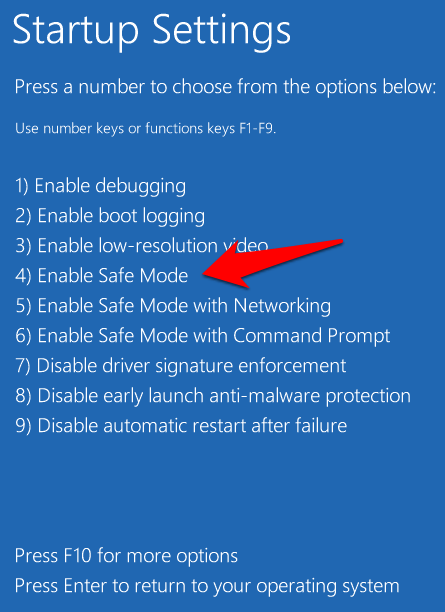
1. Turn on your computer and press the F8 key repeatedly until the Advanced Boot Options menu appears.
2. Use the arrow keys to select “Safe Mode” and press Enter.
3. Once Windows starts up in Safe Mode, open the User Profile Service by typing “services.msc” into the Start menu search bar and pressing Enter.
4. Scroll down to find the Windows User Profile Service and right-click on it. Select “Properties” and then set the service to “Automatic” startup type. Click “Apply” and then “OK”.
5. Restart your computer and log in as the affected user. Windows should now load the user profile data without any errors.
If this doesn’t work, you may need to check your user account settings and file permissions, or perform a system file error check. If you have any questions or experience data loss, it’s a good idea to consult with a Windows administration or networking expert.
Creating a New Local User Account
To fix the “Windows user profile cannot be loaded” error, you can create a new local user account on your computer. Here’s how:
1. Log in to your computer as an administrator.
2. Open the Control Panel and navigate to “User Accounts.”
3. Click “Manage another account” and then “Add a new user account.”
4. Follow the prompts to create a new local user account with a unique username and password.
5. Log out of your current account and sign in to the new account.
6. Transfer any necessary files and settings to the new account.
7. Once you’ve confirmed that everything is working properly, you can delete the old, corrupted user profile.
Note: Make sure to have the necessary credentials and permissions to perform these steps. If you’re experiencing this issue on a Windows server, the process may differ slightly. If you’re unsure about anything, consult with a professional or refer to official documentation for more information.
Using System Restore to Fix User Profile Error
Using System Restore is a straightforward way to fix a user profile error in Windows. First, boot your computer and press F8 to access the Advanced Boot Options menu. Choose “Safe Mode with Command Prompt.” Once the Command Prompt appears, type “rstrui.exe” and press Enter to launch System Restore. Follow the instructions to choose a restore point before the user profile load error occurred. Restore your computer to that point. Once the restore is complete, restart your computer and try logging in again. The result should be a successful login without any user profile errors. Keep in mind that this method only works if you have a restore point available from before the error occurred. If not, you may have to try another solution.
Restarting User Profile Service to Fix Error
To fix the “Windows User Profile Cannot Be Loaded” error, you can try restarting the User Profile Service. Here’s how:
1. Press the Windows key + R to open the Run dialog box.
2. Type services.msc and press Enter.
3. Scroll down to find the “User Profile Service” and right-click on it.
4. Select “Restart” from the context menu.
5. Wait for the service to restart and then try to log in again.
Restarting the User Profile Service can sometimes resolve issues with corrupted profiles or system file errors. If this doesn’t solve the problem, you may need to try other solutions such as resetting credentials or creating a new user profile. Remember to always back up your important files and data before making any changes to your system.
Replacing NTUSER.dat File to Fix User Profile Error
To fix the “Windows User Profile Cannot Be Loaded” error, one solution is to replace the NTUSER.dat file. First, log in as another user with administrative privileges. Then, navigate to the user’s folder in File Explorer and rename the NTUSER.dat file to NTUSER.old.
Next, copy the NTUSER.dat file from the default user’s folder (C:\Users\Default) and paste it into the problem user’s folder.
Note: If the default user’s folder doesn’t contain an NTUSER.dat file, copy it from a working user’s folder.
Finally, rename the copied NTUSER.dat file to match the original file name and restart the computer. The user should now be able to log in without the profile load error.
This method works for Windows Vista and newer operating systems, including Windows Server 2012. If the problem persists, further investigation may be necessary to determine other possible causes.
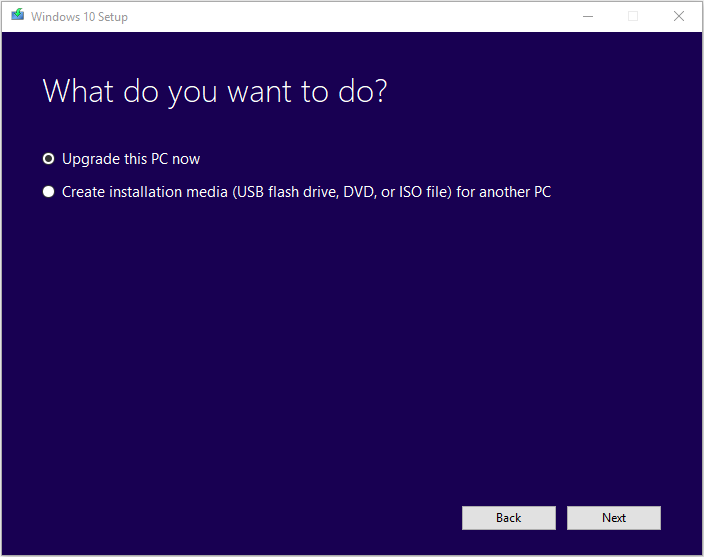
Fixing Default User Profile and Running an In-Place Upgrade
| Topic | Description |
|---|---|
| Fixing Default User Profile |
|
| Running an In-Place Upgrade |
|