
Summary
- To show recent folders in Windows 10 File Explorer, pin and reset Quick Access
- Restore defaults and locate folders by resetting folders in Folder Options
- Recover accidentally deleted folders using Recycle Bin or file recovery software
- Create shortcuts for quicker access and automate list clearance at startup in File Explorer
I will discuss how to show recent folders in Windows 10 File Explorer.
Pinning and Resetting Quick Access
To pin and reset Quick Access in Windows 10 File Explorer, simply right-click on the folder you want to pin and select “Pin to Quick Access.” To reset Quick Access, go to File Explorer Options, click on “Clear” under the Quick Access section, and then click “Apply” to reset the Quick Access list. This will remove all pinned folders and recent files, giving you a fresh start.
Restoring Defaults and Locating Folders
- Open File Explorer.
- Click on the “View” tab at the top of the window.
- Click on the “Options” button on the right side of the window.
- In the Folder Options window, click on the “View” tab.
- Click on the “Reset Folders” button.
- Click “Apply” and then “OK” to save the changes.
Locating Folders
- Open File Explorer.
- Click on the “View” tab at the top of the window.
- Click on the “Options” button on the right side of the window.
- In the Folder Options window, click on the “View” tab.
- Make sure the “Show recently used files in Quick Access” box is checked.
- Click “Apply” and then “OK” to save the changes.
Recovering Accidentally Deleted Folders
To recover accidentally deleted folders in Windows 10 File Explorer, you can try using the Recycle Bin. Simply go to the Recycle Bin on your desktop and look for the folder you want to restore. Right-click on the folder and select “Restore” to bring it back to its original location. If you can’t find the folder in the Recycle Bin, you can try using file recovery software like Recuva. Download and install the software, then follow the on-screen instructions to scan for and recover your deleted folders.
Creating Shortcuts for Quicker Access
To create shortcuts for quicker access to recent folders in Windows 10 File Explorer, follow these steps:
1. Open File Explorer by pressing Windows key + E.
2. Navigate to the folder you want to create a shortcut for.
3. Right-click on the folder and select “Create shortcut” from the context menu.
This will create a shortcut to the folder on your desktop or in the current directory. You can then move this shortcut to your desired location for quicker access. By creating shortcuts to recent folders, you can save time and streamline your workflow.
Filtering and Sorting File Types
| File Type | Description |
|---|---|
| .docx | Microsoft Word Document |
| .xlsx | Microsoft Excel Spreadsheet |
| Adobe PDF Document | |
| .jpg | JPEG Image |
| .mp3 | MP3 Audio File |
Automating List Clearance at Startup
To automate list clearance at startup in Windows 10 File Explorer, you can create a batch file to delete the contents of specific folders. First, open Notepad and type “del /q /s /f C: \path\to\folder\*” (replace “path\to\folder” with the actual path of the folder you want to clear). Save the file with a . bat extension.
Next, press Win + R, type “shell: startup” and press Enter to open the Startup folder. Finally, move the batch file you created into the Startup folder. Now, every time you start your computer, the contents of the specified folder will automatically be cleared.
Understanding and Managing Privacy Settings
To understand and manage privacy settings in Windows 10 File Explorer, you can customize which folders are shown in the Quick Access section. To show recent folders in Windows 10 File Explorer, click on the “View” tab at the top of the File Explorer window. Next, click on the “Options” button on the right side of the ribbon. In the Folder Options window that appears, select the “General” tab.
Under the General tab, find the section labeled “Privacy” and check the box next to “Show recently used files in Quick Access”. This will display recent folders in the Quick Access section of File Explorer, making it easier to access frequently used folders.
F.A.Q.
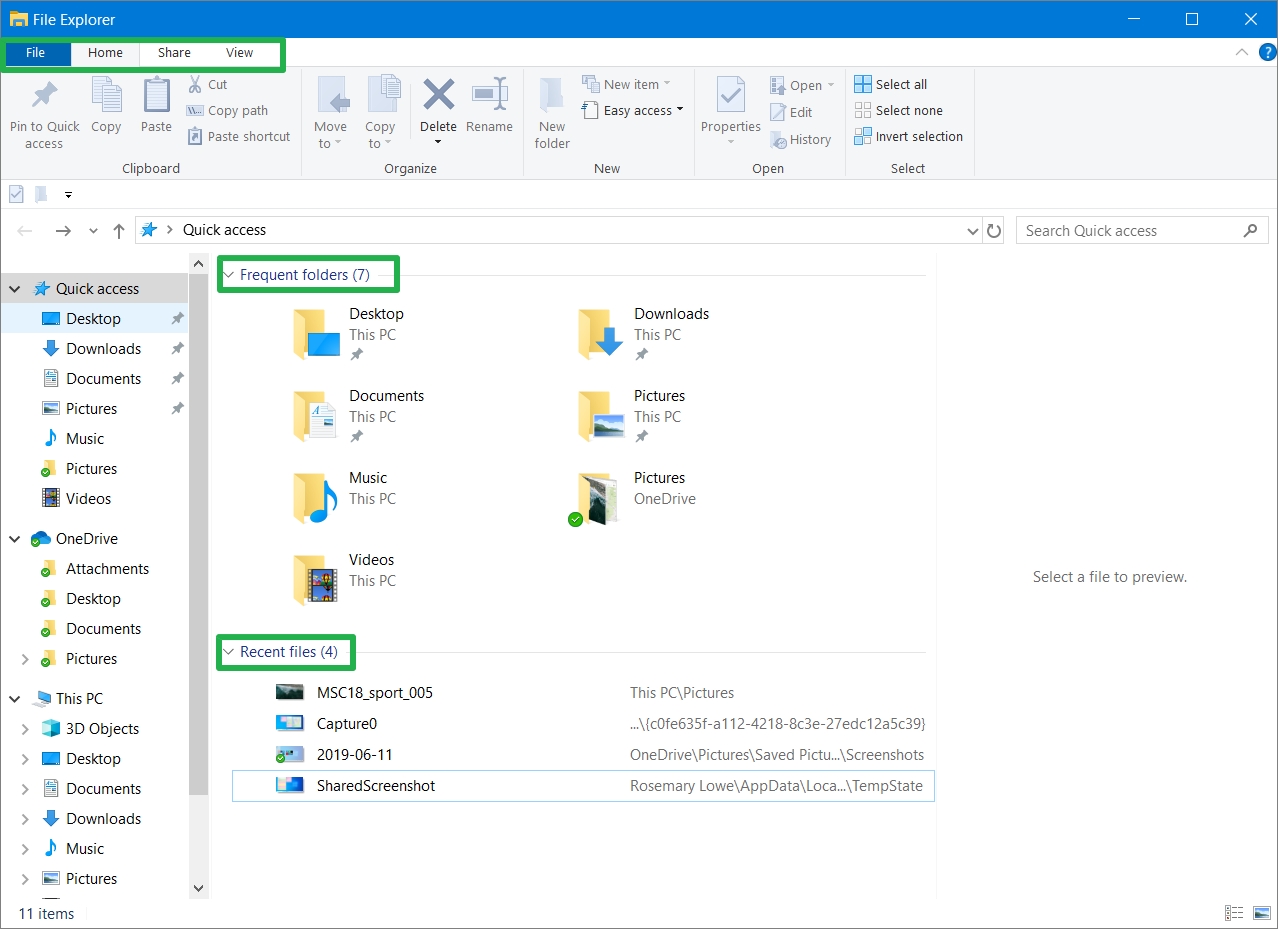
How do I see recent folders in File Explorer?
To see recent folders in File Explorer, open File Explorer from the taskbar and select Quick Access from the left sidebar. This will display a list of recently opened files in the right pane for you to scroll through and find the folder you are looking for.
How to get recent folders displaying in Windows 10 permanently?
To permanently display recent folders in Windows 10, go to the Start menu, click on Settings, then click on Personalization. From there, click on Start and turn on the option to show recently opened items in Jump Lists on Start or the taskbar and in File Explorer Quick Access.
What happened to recent folders in Windows 10?
Recent folders in Windows 10 can be accessed by following these steps: Open the Windows Setting, click “Personalization” in the left pane, then click the “Start” option. Then turn on the “Show recently opened items in Start, Jump Lists, and File Explorer” button.
How do I turn on recent files in Windows 10?
To turn on recent files in Windows 10, you need to click on the “File” menu, select “Options”, go to the General tab, tick the box next to “Show recently used files in Quick Access”, and click ‘OK’ to save the changes.