
Introducing the article that unravels the puzzle behind Windows 10’s elusive Thread Stuck in Device Driver Error.
Understanding the “Thread Stuck in Device Driver” BSOD Error
If you’re experiencing the “Thread Stuck in Device Driver” BSOD error on your Windows 10 computer, there are a few steps you can take to resolve it.
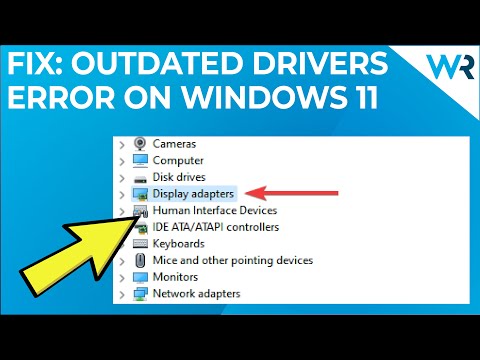
First, make sure your device drivers are up to date. Outdated or incompatible drivers can often cause this error. To update your drivers, go to Device Manager, locate the specific device driver causing the issue, right-click on it, and select “Update driver.”
If updating the driver doesn’t fix the issue, you can also try rolling back to a previous version of the driver. To do this, follow the same steps in Device Manager, but instead of selecting “Update driver,” choose “Roll back driver.”
If the issue persists, you can also try disabling hardware acceleration in your graphics card settings. To do this, right-click on your desktop, select “Display settings,” then click on “Advanced display settings” and “Display adapter properties.” In the properties window, go to the “Troubleshoot” tab and click on “Change settings.” Here, uncheck the box that says “Enable hardware acceleration.”
Updating Your Device Drivers
To solve the Windows 10 Thread Stuck in Device Driver Error, updating your device drivers is crucial. Outdated or incompatible drivers can cause this error, resulting in a Blue Screen of Death (BSOD).
Here’s a step-by-step guide to updating your device drivers:
1. Press the Windows key + X and select Device Manager.
2. Expand the relevant category (e.g., Display Adapters for graphics card issues).
3. Right-click on the device and select Update driver.
4. Choose “Search automatically for updated driver software.”
5. Wait for Windows to search and install the latest driver.
6. Restart your computer to apply the changes.
If Windows doesn’t find an updated driver, you can visit the manufacturer’s website and download the latest driver manually.
Upgrading Standard System Drivers
- Identify the outdated drivers that need to be upgraded
- Open Device Manager by right-clicking on the Start button and selecting Device Manager
- Expand the relevant categories to find the outdated drivers
- Right-click on the outdated driver and select Update driver
- Choose the option to Search automatically for updated driver software
- Wait for Windows to search for and install the latest driver updates
- Restart the computer to apply the driver updates
Running a System File Checker (SFC) Scan
To solve the Windows 10 Thread Stuck in Device Driver error, you can run a System File Checker (SFC) scan. This scan checks for corrupted system files and replaces them with the correct versions. Follow these steps to run the SFC scan:
1. Press the Windows key + X and select “Command Prompt (Admin)”.
2. In the command prompt window, type “sfc /scannow” and press Enter.
3. Wait for the scan to complete. It may take some time.
4. Once the scan is finished, restart your computer.
Running an SFC scan can help resolve many issues related to system files. If the error persists, you may need to try other fixes or consult a professional.
Restoring a Previous Version of Windows
To restore a previous version of Windows, follow these steps:
1. Press the Windows key + X and select “Device Manager.”
2. Expand the category of the device driver causing the error.
3. Right-click on the device and select “Properties.”
4. Go to the “Driver” tab and click on “Roll Back Driver.”
5. Follow the on-screen instructions to complete the rollback process.
6. Restart your computer and check if the error is resolved.
If the “Roll Back Driver” option is grayed out or not available, you can try updating the driver instead:
1. Press the Windows key + X and select “Device Manager.”
2. Expand the category of the device driver causing the error.
3. Right-click on the device and select “Update Driver.”
4. Choose “Search automatically for updated driver software.”
5. Follow the on-screen instructions to complete the driver update.
6. Restart your computer and check if the error is resolved.
If the issue persists, you may need to seek further assistance from Microsoft support or a professional technician.
Running the BSoD Troubleshooter
To solve the Windows 10 Thread Stuck in Device Driver error, you can run the BSoD Troubleshooter. This tool can help identify and fix issues related to device driver BSOD errors.
To run the BSoD Troubleshooter, follow these steps:
1. Press the Windows key + I to open the Settings app.
2. Go to Update & Security.
3. Select Troubleshoot from the left-hand menu.
4. Scroll down and click on Blue Screen.
5. Click on Run the troubleshooter.
The troubleshooter will scan your system for any issues and provide potential fixes. Follow the on-screen instructions to apply the recommended solutions.
Keep in mind that the BSoD Troubleshooter may not be able to fix all thread_stuck_in_device_driver errors. If you continue to experience the issue, it’s recommended to seek further assistance from Microsoft support or a qualified technician.
Running DISM Tool
To solve the Windows 10 Thread Stuck in Device Driver Error, you can use the DISM (Deployment Image Servicing and Management) tool. DISM is a command-line tool that helps repair and restore the system image.
1. Open Command Prompt as an administrator.
2. Type the following command: DISM /Online /Cleanup-Image /RestoreHealth
This command will scan your system for any corruption and repair it if found.
3. Wait for the process to complete.
4. Restart your computer.
DISM is a powerful tool that can help resolve various Windows issues, including the Thread Stuck in Device Driver Error. By using this tool, you can fix any underlying problems that may be causing the error, ensuring a smoother and more stable system performance.
Checking the Hard Drive
To check the hard drive for potential issues causing the Windows 10 Thread Stuck in Device Driver error, follow these steps:
1. Press the Windows key + X and select “Device Manager” from the menu.
2. Expand the “Disk drives” section and right-click on your hard drive.
3. Select “Properties” and go to the “Driver” tab.
4. Click on “Driver Details” to see a list of drivers associated with your hard drive.
5. Check for any drivers that show a yellow warning sign or are outdated.
6. If you find any problematic drivers, right-click on them and select “Update driver.”
7. Follow the on-screen instructions to update the driver.
8. Restart your computer and check if the Thread Stuck in Device Driver error persists.
Removing Antivirus and Problematic Applications
- Open Task Manager by pressing Ctrl+Shift+Esc.
- Click on the Processes tab.
- Look for any antivirus or problematic application processes running in the list.
- If you find any, select the process and click on the End Task button.
- Once all the processes are ended, close Task Manager.
- Press the Windows key + R to open the Run dialog box.
- Type appwiz.cpl and press Enter to open the Programs and Features window.
- In the Programs and Features window, locate the antivirus or problematic application you want to remove.

- Click on the application and then click on the Uninstall button.
- Follow the on-screen instructions to complete the uninstallation process.
- Repeat steps 9-10 for any other antivirus or problematic applications you want to remove.
- Once all the applications are uninstalled, restart your computer to apply the changes.
Updating BIOS
To solve the Windows 10 Thread Stuck in Device Driver Error, updating the BIOS can be an effective solution.
Here’s how to update your BIOS:
1. Research your motherboard model and locate the latest BIOS version on the manufacturer’s website.
2. Download the BIOS update file and save it to a USB drive.
3. Restart your computer and enter the BIOS setup by pressing the designated key (usually Del or F2) during startup.
4. Navigate to the BIOS update section and select the USB drive as the update source.
5. Follow the on-screen instructions to install the updated BIOS.
6. Once the update is complete, restart your computer.
Updating the BIOS can resolve compatibility issues between your hardware and Windows 10, preventing the Thread Stuck in Device Driver Error from occurring. Remember to back up your important files before making any changes to your BIOS.
Checking Hardware
1. Start by ensuring all hardware components are properly connected and functioning. Check for any loose cables or faulty connections.
2. If you suspect a hardware issue, run a diagnostic test on your computer. This can help identify any potential problems with your hardware.
3. Pay special attention to your graphics card and its drivers. Update your graphics card driver to the latest version to ensure compatibility with Windows 10.
4. If you recently installed new hardware, such as RAM or a graphics card, make sure it meets the system requirements and is properly installed.
5. Check for any signs of overheating, such as unusual fan noises or excessive heat coming from your computer. Clean any dust or debris that may be blocking the airflow.
6. Consider running a memory test to check for any issues with your RAM. Faulty RAM can cause thread stuck in device driver errors.
7. If you’re still experiencing the error, it’s recommended to seek professional help or contact our support team for further assistance.