
Looking for a user manual guide for the Konica Minolta 3300P? Look no further.
Safety Information
When using the Konica Minolta 3300P printer, it is important to prioritize safety. Always follow the safety guidelines outlined in the user manual to ensure the wellbeing of yourself and others.
Before using the printer, make sure to carefully read and understand the safety information provided in the user manual. It is important to familiarize yourself with the potential hazards and safety precautions associated with the printer.
When setting up the printer, ensure that it is placed on a stable and level surface to prevent any accidents. Additionally, make sure that the printer is installed in a well-ventilated area to prevent overheating.
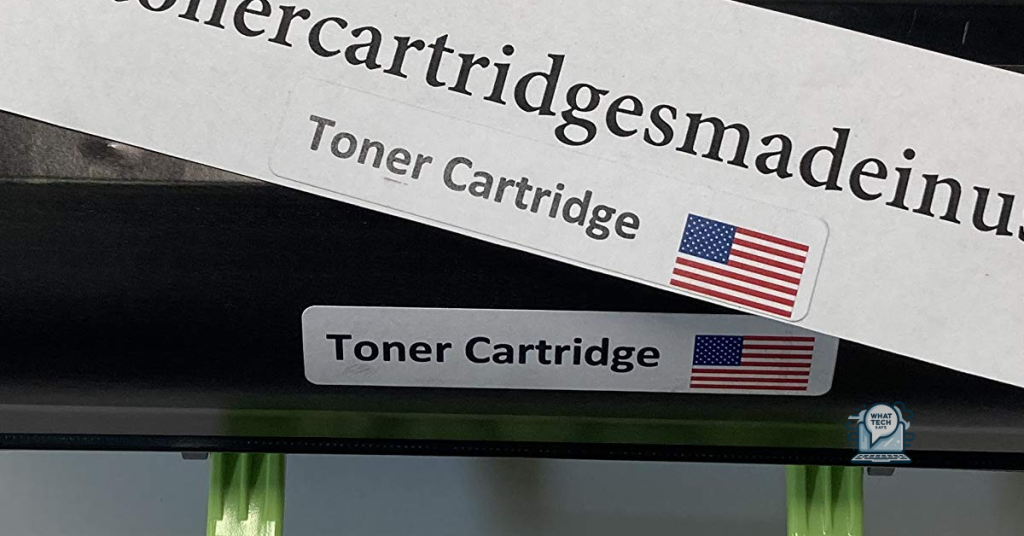
When handling the toner cartridge, be sure to do so with care. Do not expose the toner cartridge to direct sunlight or high temperatures, and always keep it out of reach of children.
In the event of a paper jam or any other issue, it is important to follow the proper procedures outlined in the user manual to avoid any potential hazards. Do not attempt to force the printer to continue operating if it is not functioning properly.
Regular maintenance of the printer is important for both safety and performance reasons. Always follow the maintenance guidelines provided in the user manual to ensure that the printer continues to operate safely and efficiently.
In the event of any technical issues or concerns, it is important to refer to the troubleshooting section of the user manual. Do not attempt to repair the printer yourself unless you are qualified to do so.
Following these safety guidelines will help ensure that you and others can use the Konica Minolta 3300P printer safely and efficiently. Always refer to the user manual for specific safety information and guidelines.
Learning About the Printer
The user manual guide covers important topics such as printer setup, operation, maintenance, and troubleshooting. It is crucial to familiarize yourself with the printer’s features and controls to effectively utilize its functions.
Start by reviewing the printer specifications and supported paper sizes. This will help you understand the printer’s capabilities and limitations when it comes to handling different paper sizes and print jobs.
Next, familiarize yourself with the printer’s control panel and menu options. The user manual guide provides detailed instructions on navigating the printer’s menu and accessing various settings.
In addition, the user manual guide covers essential information about print jobs, including how to send documents to the printer from your computer or other devices. Understanding the print job process is crucial for ensuring successful and efficient printing.
The user manual guide also provides valuable insights into printer maintenance, such as replacing toner cartridges, clearing paper jams, and performing routine cleaning procedures. Proper maintenance is essential for prolonging the printer’s lifespan and maintaining print quality.
Moreover, the user manual guide includes troubleshooting tips and solutions for common printer issues. Being able to troubleshoot and resolve printer problems is key to minimizing downtime and maximizing productivity.
It is important to note that the user manual guide may also include information about the printer’s energy-saving features and compliance with Energy Star requirements. Understanding how to optimize the printer’s energy efficiency is beneficial for reducing operating costs and environmental impact.
Furthermore, the user manual guide may provide details about the printer’s embedded HTTP server, which allows users to access the printer’s settings and status via a web browser. Familiarizing yourself with the embedded HTTP server can provide convenient remote access to the printer.
Selecting a Location
It’s also important to choose a location that allows for easy access to the printer’s control panel and paper trays. This will make it easier to load paper and troubleshoot any issues that may arise during printing. Additionally, ensure that the location provides adequate ventilation to prevent the printer from overheating.
When selecting a location, consider the paper size and print job requirements. If you frequently print documents of varying sizes, choose a location that allows for easy access to different paper trays. This will streamline the printing process and reduce the need to constantly change paper sizes.
Furthermore, consider the proximity to your computer or network. If the printer will be connected to a single computer, choose a location that is within reach of the computer’s USB or Ethernet cable. If the printer will be connected to a network, ensure that the location is within range of the network’s signal.
In addition, it’s important to consider the energy efficiency of the location. If possible, place the printer in a location that is in compliance with Energy Star guidelines. This will help reduce energy consumption and minimize the printer’s environmental impact.
Printer Configurations
To configure your Konica Minolta 3300P printer, you can access the printer settings through the control panel or the web server interface.
To access the printer settings through the control panel, press the Menu button on the printer and navigate to the Printer Settings option. From there, you can adjust settings such as paper size, document type, and number of copies.
If you prefer to configure the printer settings through the web server interface, you can do so by entering the printer’s IP address into a web browser. From there, you can access a wide range of settings and options to customize the printer to your specific needs.
When configuring the printer, it’s important to consider the document type and paper size you will be using. Ensure that the printer is set to the correct paper size to avoid any printing issues.
Additionally, you can adjust the number of copies you want to print by selecting the appropriate option in the printer settings menu.
Using the Control Panel
To use the Control Panel on the Konica Minolta 3300P, first, ensure that the printer is turned on and connected to your computer. Then, access the Control Panel by following these steps:
1. Click on the “Start” button on your computer and select “Control Panel” from the menu.
2. In the Control Panel, you will find various settings and options for managing your printer and its functions.
3. Locate the Konica Minolta 3300P printer in the list of devices and printers.
4. From here, you can adjust the printer settings, check the ink levels, and perform maintenance tasks.
5. You can also access the printer’s properties to customize its behavior and performance.
6. Make sure to explore the different tabs and options available in the printer properties to optimize your printing experience.
7. If you encounter any issues with the printer, the Control Panel is a good place to start troubleshooting and diagnosing the problem.
8. Refer to the user manual for specific instructions on using the Control Panel to perform tasks such as clearing paper jams or changing print settings.
In addition to using the Control Panel on your computer, you can also access the printer’s embedded web server to manage its settings and monitor its status. To do this, simply open a web browser and enter the printer’s IP address in the address bar. From the web interface, you can view the printer’s status, configure network settings, and access advanced features.
It’s also worth noting that the Konica Minolta 3300P user manual contains a detailed table of contents that can help you quickly find information on using the Control Panel and other printer functions. Refer to the table of contents to locate the specific section that covers the Control Panel and its features.
Control Panel Light Sequences
The Konica Minolta 3300P printer control panel uses light sequences to communicate various status and error messages. These light sequences are important for troubleshooting and understanding the printer’s current state.
Power On: When you power on the printer, the control panel lights will go through a sequence to indicate that the printer is initializing. This is normal and should only last for a few moments.
Ready State: When the printer is ready to print, the control panel lights will be steady and not flashing. This indicates that the printer is ready to receive print jobs.
Error Messages: If there is an error with the printer, the control panel lights will flash in a specific pattern to indicate the type of error. Consult the user manual for a list of error code sequences and their meanings.
Low Toner: When the printer is running low on toner, the control panel lights will indicate this with a specific light sequence. It’s important to have a replacement toner cartridge on hand to avoid any printing interruptions.
Paper Jams: If there is a paper jam in the printer, the control panel lights will flash in a specific pattern to indicate the location of the jam. Follow the user manual’s instructions for clearing paper jams.
Other Status Messages: The control panel lights may also indicate other status messages, such as when the printer is warming up, processing a print job, or experiencing a service request. Refer to the user manual for a comprehensive list of status messages and their corresponding light sequences.
It’s important to familiarize yourself with the control panel light sequences on the Konica Minolta 3300P printer, as they provide valuable information about the printer’s status and any potential issues that may arise during operation. By understanding these light sequences, you can effectively troubleshoot problems and keep the printer running smoothly.
Embedded Web Server Use
The Konica Minolta 3300P printer comes with an embedded web server that allows users to manage the printer’s settings and functions remotely through a web browser. This feature provides convenience and flexibility for users who need to monitor or control the printer from a different location.
To access the embedded web server, first, ensure that the printer is connected to the same network as the computer you will use to access the web interface. Then, open a web browser and enter the printer’s IP address in the address bar. You can find the printer’s IP address by printing a network configuration page from the printer’s control panel.
Once you have entered the printer’s IP address in the web browser, you will be prompted to enter the printer’s login credentials. By default, the username is “admin” and the password is also “admin.” However, it is recommended to change the default password for security purposes.
After logging in, you will have access to the embedded web server’s interface, where you can view and modify various printer settings, such as paper tray configurations, print quality adjustments, and network settings. You can also check the printer’s status, monitor the print queue, and view the printer’s usage history.
In addition, the embedded web server allows you to configure email alerts for notifying you about printer errors or when supplies are running low. This can help you stay on top of maintenance and prevent unexpected downtimes.
Furthermore, the web server provides access to the printer’s user manual and documentation in PDF format, making it easy to reference and troubleshoot any issues that may arise. This can be particularly useful for users who prefer digital access to documentation or who may have misplaced the physical user manual.
Additional Printer Setup
To perform additional setup for your Konica Minolta 3300P printer, follow these steps:
1. Connect the printer to your computer using a USB cable or through a network connection. Make sure the printer is turned on and ready.
2. Install the necessary printer drivers on your computer. You can usually find the drivers on the manufacturer’s website or on the installation CD that came with the printer.
3. Once the drivers are installed, you may need to configure the printer settings. This can usually be done through the printer properties in the Control Panel on a Windows computer, or through the System Preferences on a Mac.
4. If you are setting up the printer on a network, you may need to configure the printer’s IP address and other network settings. Refer to the printer’s user manual for instructions on how to do this.
5. You may also want to set up the printer to be accessible from mobile devices or to print from the cloud. Many modern printers have built-in support for printing from smartphones and tablets, as well as from popular cloud services like Google Drive and Dropbox.
6. If you are using the printer in a business or office environment, you may want to set up user accounts and access controls to restrict who can use the printer and what they can print.
Remember to refer to the Konica Minolta 3300P user manual for detailed instructions on how to perform these additional setup tasks. The manual can usually be found in PDF format on the manufacturer’s website or on the installation CD that came with the printer.
Optional Card Installation
If you have purchased an optional card for your Konica Minolta 3300P printer, you may need to install it in order to enable certain features or functionalities. Before you begin the installation process, make sure to power off the printer and unplug it from the electrical outlet to ensure safety.
Once the printer is powered off and unplugged, locate the slot on the printer where the optional card is to be installed. Carefully insert the card into the designated slot, ensuring that it is properly aligned and securely in place.
After the card is inserted, you can power the printer back on and proceed with any necessary configuration steps to activate the new features associated with the optional card. This may involve accessing the printer’s menu or control panel to enable the card and adjust any settings as needed.
If you encounter any issues during the installation process, refer to the user manual guide for troubleshooting tips or contact Konica Minolta customer support for assistance. It’s important to follow the manufacturer’s instructions carefully to avoid damaging the optional card or the printer itself.
Once the optional card is successfully installed and configured, you should be able to enjoy the added functionality or features that it provides. Whether it’s expanding the printer’s connectivity options or enhancing its capabilities, the optional card can be a valuable addition to your Konica Minolta 3300P printer.
Remember to always handle the optional card with care and store it in a safe place when not in use. Additionally, keep the user manual guide for future reference in case you need to make any changes or troubleshoot issues related to the optional card.
Hardware Options Installation
When installing hardware options for the Konica Minolta 3300P printer, it is important to follow the user manual guide for proper installation. First, ensure that the printer is turned off and unplugged from the power source before installing any hardware options. Take the necessary precautions to avoid any electrical hazards during the installation process.
To install hardware options such as additional memory or a hard drive, locate the appropriate slot or compartment on the printer where the hardware will be installed. Open the access panel or cover to gain access to the internal components of the printer.
Carefully insert the hardware option into the designated slot, ensuring that it is securely connected and properly aligned. Use caution to avoid damaging any delicate components during the installation process.
After the hardware option is installed, close the access panel or cover and securely fasten any screws or latches to ensure that the hardware is properly secured within the printer. Once the hardware is installed, plug the printer back into the power source and turn it on to verify that the installation was successful.
Refer to the user manual guide for specific instructions on installing different hardware options for the Konica Minolta 3300P printer. It is important to follow the manufacturer’s guidelines to ensure that the hardware is installed correctly and functions properly within the printer.
If you encounter any difficulties during the installation process or have questions about installing hardware options, refer to the troubleshooting section of the user manual guide for assistance. Additionally, you can contact Konica Minolta customer support for further guidance on hardware installation.
Following these direct instructions for installing hardware options in the Konica Minolta 3300P printer will help ensure that the installation process is carried out smoothly and successfully. Always refer to the user manual guide for specific details and guidelines related to hardware installation for this printer.
Cable Attachment
To attach the cable for the Konica Minolta 3300P printer, follow these steps:
1. First, locate the cable that was included with the printer. It should have a USB connector on one end and a connector that matches the port on the printer on the other end.
2. Next, make sure the printer is turned off before connecting the cable. This will help prevent any potential issues with the connection.
3. Once the printer is turned off, locate the USB port on the back of the printer. It is usually located near the power cord and other ports.
4. Take the USB connector end of the cable and plug it into the USB port on the printer. Make sure it is securely connected to ensure a stable connection.
5. After the cable is securely connected to the printer, locate an available USB port on your computer.
6. Take the other end of the cable and plug it into the USB port on your computer. Again, ensure that it is securely connected to establish a stable connection.
7. Once the cable is connected to both the printer and the computer, you can turn on the printer.
8. Your computer should automatically detect the new printer and install the necessary drivers. If it does not, you may need to manually install the drivers using the installation CD that came with the printer.
9. After the drivers are installed, you can begin using the printer to print your documents.
Controller Board Access
To access the controller board on the Konica Minolta 3300P, you will need to follow a few simple steps. First, make sure the printer is turned off and unplugged to avoid any electrical hazards. Once the printer is safely disconnected, locate the access panel on the side or back of the printer. This panel is usually secured with screws or latches, so you may need a screwdriver or tool to remove it.
Carefully remove the access panel to reveal the controller board inside the printer. Take note of any cables or connections attached to the board, as you will need to disconnect these in order to access the board fully. Once the cables are disconnected, you can safely remove the controller board from the printer for maintenance or replacement.
When working with the controller board, be sure to handle it with care and avoid touching any sensitive components. If you are replacing the board, be sure to align the new board properly and reattach any cables securely before closing the access panel. Once the board is in place and all connections are secure, you can replace the access panel and plug the printer back in.
It’s important to note that accessing the controller board should only be done by qualified individuals who are familiar with printer maintenance and repair. If you are unsure about accessing the controller board or performing any maintenance, it’s best to seek professional assistance to avoid any damage to the printer or potential safety hazards.
Remember to always refer to the user manual for specific instructions and safety guidelines when working with the controller board or any other internal components of the Konica Minolta 3300P printer. Following the manufacturer’s guidelines will help ensure the safe and proper maintenance of your printer.
Printer Software Setup
To set up the printer software for the Konica Minolta 3300P, follow these simple steps. First, ensure that the printer is connected to your computer and powered on. Then, insert the installation CD that came with the printer into your computer’s CD drive.
Once the CD is inserted, the installation process should start automatically. If it doesn’t, locate the CD drive in “My Computer” and double-click on the setup file to begin the installation. Follow the on-screen prompts to complete the installation process.
If you don’t have the installation CD, you can also download the printer software from the Konica Minolta website. Simply visit their website and navigate to the support or downloads section. Locate the software for the 3300P printer and download it to your computer. Once the download is complete, double-click on the file to begin the installation process.
During the installation, you may be prompted to select the connection type for your printer (USB, network, etc.). Choose the appropriate connection type and follow the on-screen instructions to complete the installation.
After the software is installed, you may need to configure the printer settings. To do this, open the printer software on your computer and navigate to the settings or configuration menu. Here, you can adjust settings such as paper size, print quality, and ink levels.
If you encounter any issues during the installation or setup process, refer to the user manual guide that came with the printer. This guide contains troubleshooting tips and instructions for setting up the printer software.
Once the printer software is set up, you should be able to print documents and images from your computer to the Konica Minolta 3300P with ease. If you have any further questions or need assistance, don’t hesitate to contact Konica Minolta’s customer support team for help.
Networking and Wireless Setup
Setting up networking and wireless capabilities for your Konica Minolta 3300P printer is a straightforward process that will allow you to easily connect and print from multiple devices. To begin the setup, make sure that your printer is powered on and ready to go.
First, access the printer’s menu by pressing the Menu button on the control panel. Navigate to the Network settings option using the arrow keys and press the OK button to select it.
Next, select the Wireless Setup option from the menu and follow the on-screen prompts to connect your printer to your wireless network. You may need to input your network’s SSID and password during this process, so have that information handy.
Once your printer is connected to the wireless network, you can start printing from any device that is also connected to the same network. This could include computers, smartphones, or tablets.
If you encounter any issues during the setup process, refer to the user manual for troubleshooting tips. Additionally, you can visit the Konica Minolta website for further support and resources.
By following these instructions, you can ensure that your Konica Minolta 3300P printer is ready to use on your wireless network, providing you with the flexibility to print from anywhere within range of the network.
Menu Settings and Network Page Printing
In the Konica Minolta 3300P User Manual Guide, you can find detailed instructions on how to access the menu settings and set up network page printing. To access the menu settings, press the Menu button on the printer’s control panel. This will allow you to customize various settings such as paper size, print quality, and network settings.
To set up network page printing, first, ensure that the printer is connected to the network. Then, navigate to the network settings in the printer’s menu. Here, you can configure the printer to allow for network page printing, which will enable users to send print jobs to the printer from any device connected to the network.
In addition to setting up network page printing, the user manual guide provides information on how to troubleshoot any issues that may arise during the setup process. It offers troubleshooting tips and solutions for common problems that users may encounter when configuring network page printing.
The user manual guide also includes information on accessing the printer’s embedded web server, which allows users to manage the printer’s settings and view its status from any device with a web browser. This can be a useful tool for monitoring the printer’s performance and making adjustments to its settings as needed.
Loading Paper and Media
To load paper and media into your Konica Minolta 3300P printer, follow these simple steps.
First, open the paper tray by pulling it out from the printer.
Next, adjust the paper guides to the width of the paper you are using. This will ensure that the paper is properly aligned and fed into the printer.
Now, take a stack of paper and fan it to prevent any sheets from sticking together. Then, place the paper into the tray with the side you want to print on facing down.
After that, adjust the rear paper guide to fit the length of the paper.
Once the paper is loaded, make sure to close the paper tray securely.
If you are using special media, such as envelopes or transparencies, refer to the user manual for specific instructions on how to load them into the printer.
Remember to only use media that is recommended for use with the Konica Minolta 3300P printer to avoid damaging the machine.
Following these steps will ensure that your printer is ready to produce high-quality prints without any issues.
Paper Tray Configurations
- Step 1: Check the paper tray for any visible obstructions or jams.
- Step 2: Remove any stuck paper or debris from the paper tray.
- Step 3: Adjust the paper guides to ensure they are properly aligned with the paper size being used.
- Step 4: Reload the paper tray with the correct paper size and type.
- Step 5: Check the paper tray settings in the printer driver or control panel to ensure they match the physical configuration of the paper tray. Adjust as necessary.
Paper and Media Guide
– The Konica Minolta 3300P User Manual Guide provides detailed information on how to use the printer effectively.
– The paper and media guide section is especially helpful for understanding the types of paper and media that are compatible with the printer.
– When selecting paper for printing, it is important to consider the weight, size, and type of paper that is suitable for the Konica Minolta 3300P.
– Refer to the paper and media guide section in the user manual for specific recommendations on paper weight and size for different types of printing tasks.
– It is essential to use the recommended paper and media types to ensure optimal print quality and avoid potential issues with the printer.
– The user manual guide also provides information on how to load different types of paper and media into the printer, as well as how to adjust the settings for the best results.
– Follow the instructions in the paper and media guide section to properly load paper and media into the printer and make the necessary adjustments in the settings.
– Understanding the paper and media guide will help users make informed decisions about the type of paper and media to use for different printing tasks.
– Additionally, the guide offers troubleshooting tips for common paper and media-related issues, such as paper jams and print quality problems.
– Consult the troubleshooting section in the paper and media guide for solutions to common issues related to paper and media usage.
–
Printing Adjustments and Methods
When it comes to making adjustments and using different printing methods with the Konica Minolta 3300P, there are a few key things to keep in mind. First and foremost, it’s important to familiarize yourself with the printer’s control panel and menu options. This will allow you to easily navigate through the various settings and make the necessary adjustments to achieve the desired print results.
– Adjusting Print Settings
To adjust print settings on the Konica Minolta 3300P, start by accessing the printer’s menu. From there, you can navigate to the print settings option and make adjustments to the paper type, print quality, and other relevant settings. It’s important to take into consideration the specific requirements of the document or image being printed in order to achieve the best results.
– Using Different Printing Methods
The Konica Minolta 3300P offers a variety of printing methods to choose from, including single-sided printing, double-sided printing, and booklet printing. Depending on the specific needs of your printing job, you can select the appropriate printing method from the menu options. This allows for flexibility and customization in order to meet the specific requirements of each print job.
– Optimizing Print Quality
In order to ensure the best print quality, it’s important to make the necessary adjustments to the printer’s settings. This includes selecting the appropriate print quality setting, adjusting the color settings, and ensuring that the paper type and size are compatible with the printer’s capabilities. By optimizing the print quality settings, you can achieve professional-looking results with every print job.
– Calibrating the Printer
Calibrating the Konica Minolta 3300P is an important step in ensuring consistent and accurate print results. This involves making adjustments to the printer’s settings to account for factors such as paper type, humidity, and temperature. By calibrating the printer on a regular basis, you can maintain the integrity of the print output and ensure that each print job meets the desired specifications.
– Performing Maintenance Tasks
In addition to making adjustments to the printer’s settings, it’s also important to perform regular maintenance tasks to keep the Konica Minolta 3300P in optimal condition. This includes cleaning the printer, replacing worn or damaged parts, and performing routine maintenance tasks as recommended by the manufacturer. By taking care of the printer, you can prolong its lifespan and ensure that it continues to produce high-quality prints.
Understanding Printer Menus
The printer menu on the Konica Minolta 3300P is an essential feature that allows users to access and customize various settings. To navigate the printer menus, start by pressing the Menu button on the control panel. This will display the main menu options on the printer’s LCD screen.
Use the arrow keys to navigate through the menu options and select the desired setting or function. Once you have selected a specific option, you can then use the arrow keys to further customize the settings within that particular menu.
The printer menu typically includes options for printing, copying, scanning, and faxing, as well as maintenance and troubleshooting functions. It is essential to familiarize yourself with the printer menu so that you can efficiently manage and optimize the printer’s performance.
When accessing the printer menu, it is crucial to pay attention to any on-screen prompts or instructions that may guide you through the process. These prompts can provide valuable information on how to navigate the menu and make the necessary adjustments.
In addition to the basic menu options, the Konica Minolta 3300P user manual guide may also provide detailed information on advanced menu settings and functions. It is recommended to refer to the user manual for specific instructions on accessing and utilizing these advanced features.
The printer menu is a powerful tool that allows users to customize and control various aspects of the printing process. By understanding how to navigate the menu and make the necessary adjustments, users can optimize the printer’s performance and ensure high-quality output.