
Remote desktop connection is a powerful tool that allows users to control a computer from a remote location. To access this feature, you need to download Microsoft Remote Desktop Connection on your device. In this article, we’ll guide you through the steps to download and set up this tool on your computer.
System Requirements for Microsoft Remote Desktop Connection
Before downloading the Microsoft Remote Desktop Connection, it is important to ensure that your system meets the minimum requirements. For Windows users, the operating system must be Windows 7 or later. For Mac users, the operating system must be OS X 10.10 or later. Your device should also have a reliable internet connection to ensure smooth remote desktop connectivity. In addition, it is recommended to have at least 4GB of RAM and a dual-core processor to avoid lagging and other performance issues. As for mobile devices, the Microsoft Remote Desktop app is available for both iOS and Android platforms with varying system requirements depending on the device. Ensure that your device meets the minimum requirements before downloading the app to avoid any compatibility issues.
Steps to Download Microsoft Remote Desktop Connection from Microsoft Website
1. Open your web browser and go to the Microsoft website.
2. Search for “Microsoft Remote Desktop Connection” in the search bar.
3. Click on the download link for the version that is compatible with your operating system.
4. Read and accept the terms and conditions.
5. Click on the “Download” button.
6. Once the download is complete, double-click on the downloaded file to begin the installation process.
7. Follow the installation prompts to complete the installation.
8. Once the installation is complete, launch the Microsoft Remote Desktop Connection app and you’re ready to connect to a remote desktop.
By following these simple steps, you can easily download and install Microsoft Remote Desktop Connection from the Microsoft website.
Alternative Ways to Download Microsoft Remote Desktop Connection
- Using the Microsoft Store: Open the Microsoft Store app on your computer, search for “Remote Desktop,” and click the “Get” button to download the Microsoft Remote Desktop Connection app.
- Downloading from Microsoft’s website: Go to the Microsoft Remote Desktop Connection download page, select your preferred language, and click the “Download” button to download the setup file.
- Using PowerShell: Open PowerShell on your computer, type “Install-Module -Name MicrosoftRemoteDesktop” and press enter to install the Microsoft Remote Desktop Connection module.
- Using Chocolatey: If you have Chocolatey installed on your computer, open the command prompt and type “choco install microsoft-remote-desktop” to download and install the Microsoft Remote Desktop Connection app.
- Using Homebrew: If you have Homebrew installed on your Mac, open the terminal and type “brew install –cask microsoft-remote-desktop” to download and install the Microsoft Remote Desktop Connection app.
import urllib.request
url = "https://download.microsoft.com/download/4/4/C/44CDB5E5-8A5A-4F28-8781-6B7DDBB2E658/Windows6.1-KB969084-x64.msu"
# Replace the URL above with the actual download link for remote desktop connection.
filename = "remote_desktop_connection.msu"
# Replace the filename above with the desired name for the downloaded file.
print("Downloading Remote Desktop Connection...")
urllib.request.urlretrieve(url, filename)
print("Done!")
This code uses the `urllib.request` module to download a file from a given URL and save it to disk with the specified filename. You would need to replace the `url` and `filename` variables with the actual download link and desired filename for remote desktop connection. Additionally, you could include this code in a larger tool that provides a graphical user interface and additional features for managing remote desktop connections.
How to Install Microsoft Remote Desktop Connection on Windows
Installing Microsoft Remote Desktop Connection on Windows
Microsoft Remote Desktop Connection enables users to connect to a remote computer and access files, applications, and other resources. Here’s a step-by-step guide on how to install it on Windows:
1. Download the latest version of Remote Desktop Connection from the Microsoft Download Center.
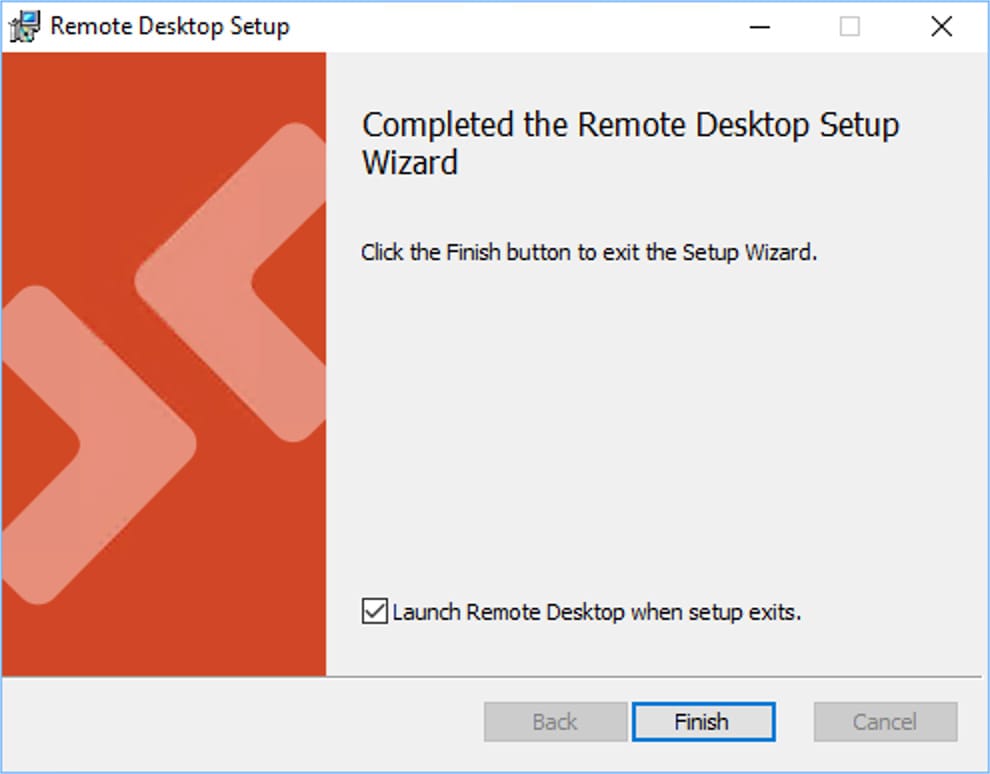
2. Open the downloaded file and follow the setup wizard.
3. Review the license terms and accept them if you agree.
4. Choose the installation location and click on “Install”.
5. Wait for the installation process to complete.
6. Once installed, open the Remote Desktop Connection app and enter the computer name or IP address you want to connect to.
7. Click “Connect” and enter your login credentials.
That’s it! You can now use Remote Desktop Connection to remotely access and control another computer.
How to Fix Common Errors During Microsoft Remote Desktop Connection Download
- Check internet connection
- Ensure that the device is connected to the internet

- Check network connections and try again
- Verify system requirements
- Check if the device meets the minimum system requirements for the download
- Upgrade device if necessary

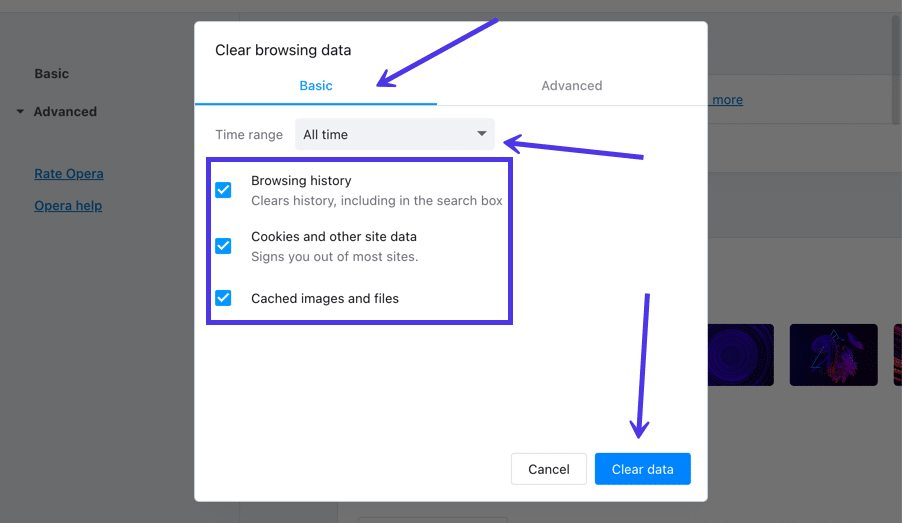
- Clear browser cache and cookies
- Open browser settings
- Click on “Clear browsing data” or “Clear cache and cookies”
- Select time range and data to be cleared
- Click on “Clear data”
- Disable antivirus and firewall temporarily
- Open antivirus or firewall settings
- Turn off protection or disable temporarily
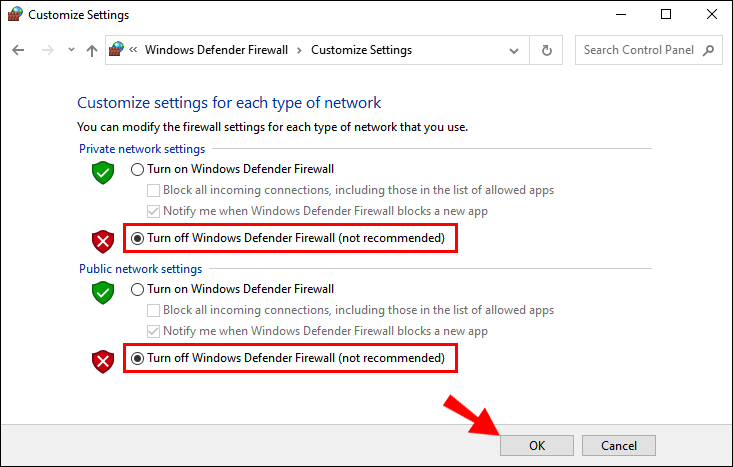
- Attempt download
- Turn protection back on or enable firewall after download is complete
- Reset download location
- Open download settings
- Reset download location to default
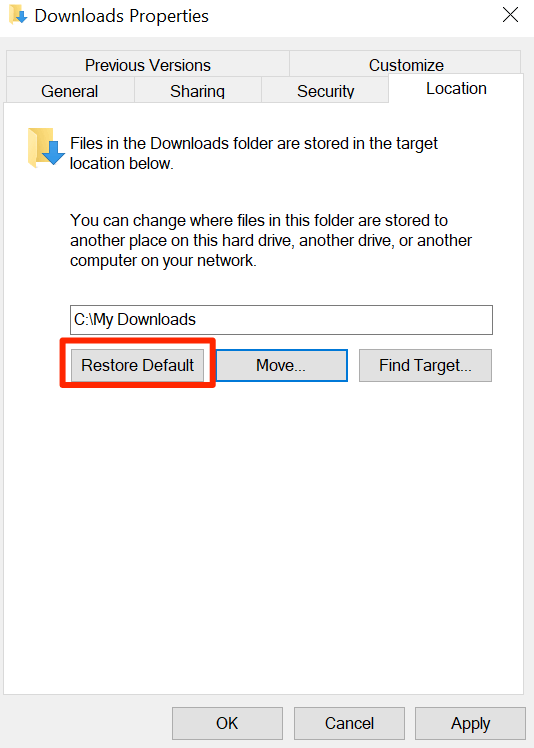
- Attempt download again
- Run troubleshooter
- Open device settings
- Search for “troubleshoot”

- Select “Troubleshoot”
- Select “Windows Update”
- Follow prompts to troubleshoot
Tips to Optimize Microsoft Remote Desktop Connection Performance
| Tip | Description |
|---|---|
| Reduce screen resolution | Lowering the screen resolution will reduce the amount of data that needs to be transmitted, improving performance. |
| Disable animations and visual effects | Disabling animations and visual effects will reduce the amount of data that needs to be transmitted, improving performance. |
| Optimize network settings | Adjusting network settings such as bandwidth usage and quality of service (QoS) can improve performance. |
| Close unnecessary programs and windows | Closing unnecessary programs and windows on both the local and remote devices can reduce the amount of data that needs to be transmitted, improving performance. |
| Use a wired connection instead of Wi-Fi | Wired connections are generally more stable and faster than Wi-Fi connections, improving performance. |